Level Editor
Basic concepts
The level editor allows you to modify and build your very own levels for Gravity Ace. It is the exact same tool that was used to design all of the levels that came with the game.
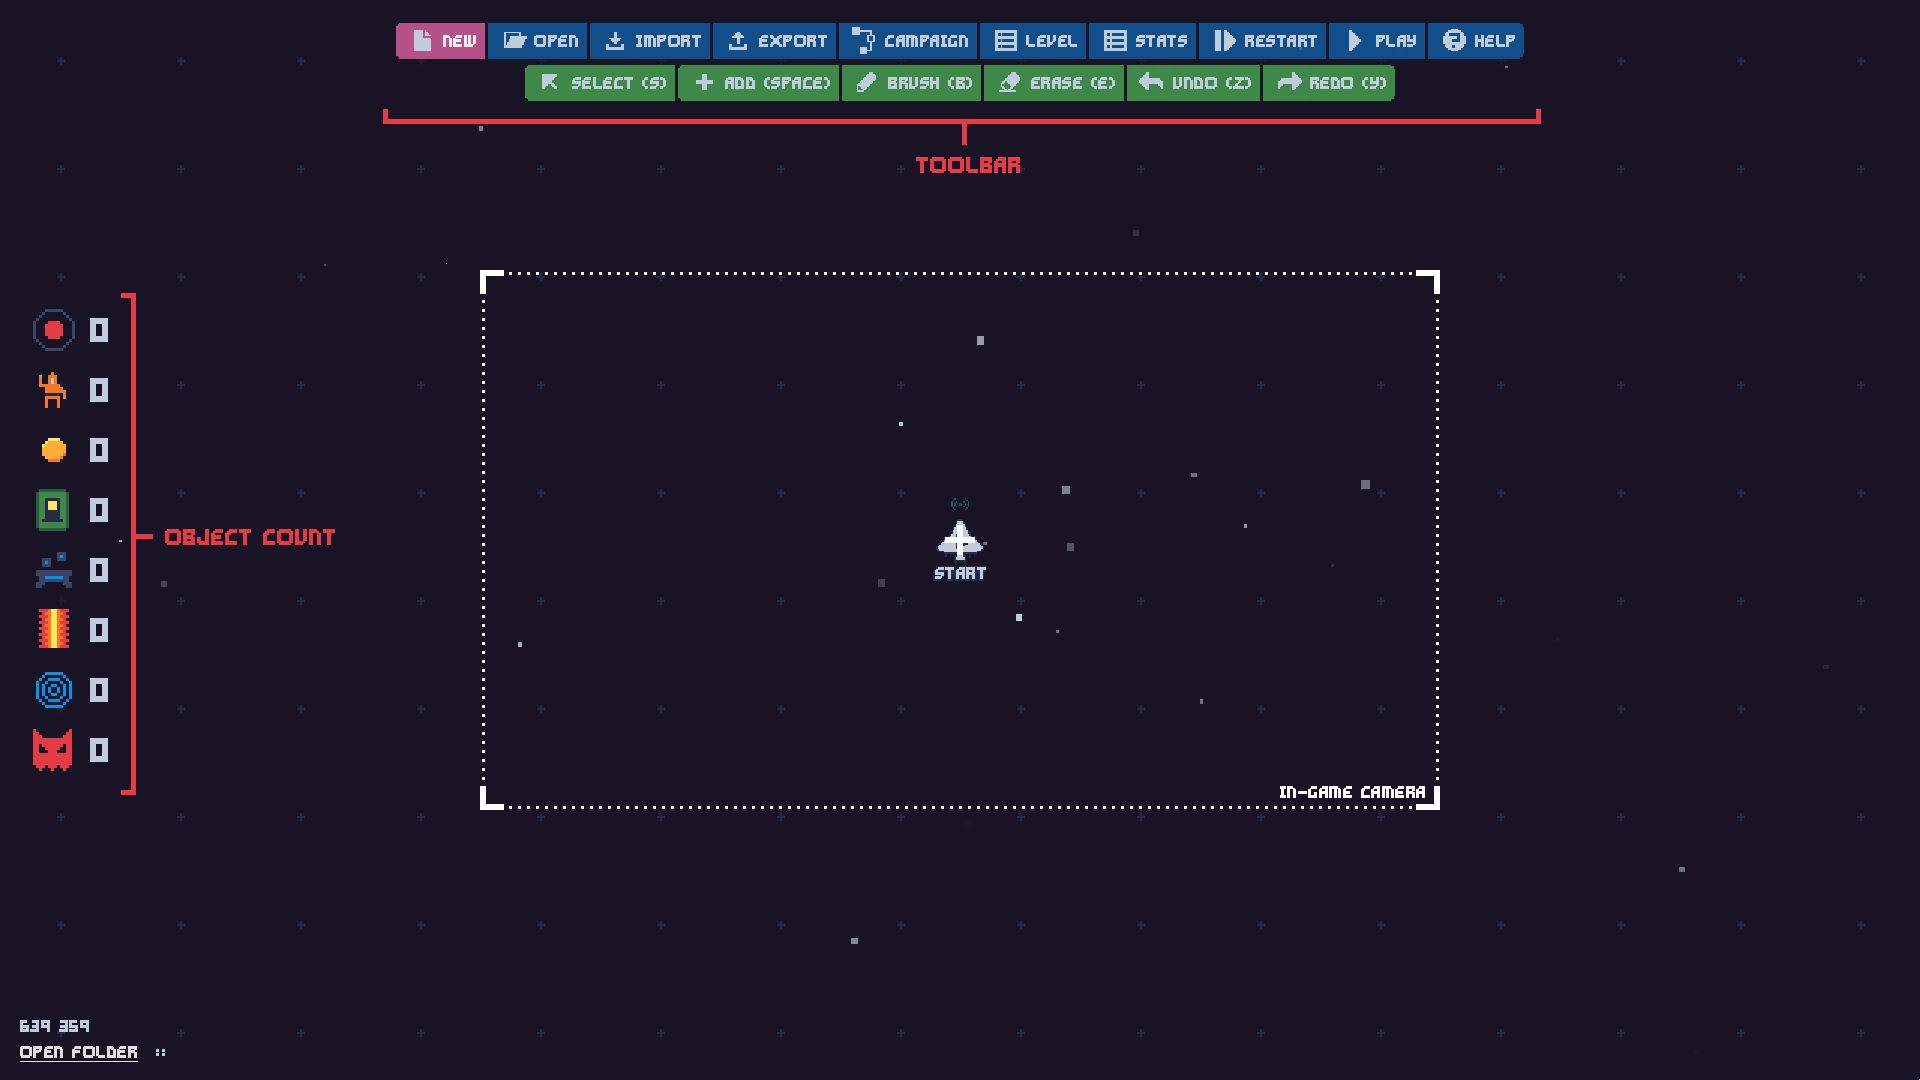
When you enter the level editor from the main menu you are presented with a blank canvas. The camera is centered on the player start position icon. Every level always has exactly one player start position. This is where the player will warp in to begin playing. You can place a new player start anywhere you like and the old one will automatically be erased. You can also move the starting position.
Moving around
- Click and drag using the middle mouse button to pan around the level.
- Use the = and - keys to zoom in and out.
Saving
Levels are saved for the first time when you play test them. Levels are organized in campaigns. Campaigns are groups of levels that are played together. Every level is part of a campaign, even if it’s the only level in the campaign. When you save your level the editor will ask you for a campaign. You can either choose an existing campaign or create a new one. After you save for the first time, your level will be automatically saved every 60 seconds and whenever you play it.
Play testing
You can play test a level by clicking either the Restart or Play buttons. Restart restarts the entire level from the very beginning. Play continues play from the current ship position. This is useful when you are playing a level and enter edit mode because it allows you to continue from right where you left off.
Level properties
Click the Level button to open the level properties panel. Here you can name the level, add a subtitle, and set options like gravity and how much fuel the player starts with.
Organizing campaigns
Click the Campaign button to open the campaign organizer. All of the levels in the campaign are listed. Levels will be played in this sequence. Drag and drop levels to change their order.
Walls
Create walls by clicking the Draw button on the toolbar (or press D). The pointer will show a brush outline where the next wall segment will be drawn. You can change the shape of the brush by pressing keys 1 through 4 on your keyboard. Click anywhere on the canvas to draw a wall. Click and drag to draw a larger wall.

When you draw a new wall segment that overlaps an existing wall, the two wall sections will be merged. Simply moving an existing wall on top of another wall will not merge them.

Erasing works just like drawing. Click the Erase button on the toolbar (or press E). You can change the shape of the eraser by pressing keys 1 through 4. Then erase by clicking anywhere on the canvas where the eraser overlaps an existing wall or walls.
Vertex manipulation
Vertex, what? A vertex is a corner on a polygon. Each wall is a polygon made of many vertices. When you select a wall the vertices are highlighted with small circles or handles. You can grab any handle and move it to a new position to change the shape of the wall.
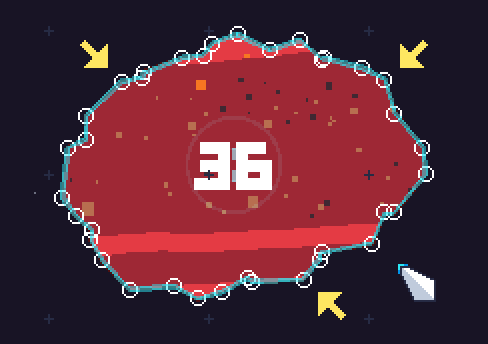
To add a new vertex, hold CTRL and left-click near a segment between two existing vertices. To delete a vertex, hold CTRL and right-click on it.
Selecting and rotating
Select any object by clicking Select on the toolbar (or press S) then left-click on the object you want to select. The object will become highlighted and the property inspector will show any properties that can be modified.
Rotate a selected object by holding down the SHIFT key and then click on the object and drag it.
Select multiple objects by dragging a box around them. You can then move or rotate the entire group.
There’s a special move mode when moving walls that allows you to move the wall and everything that is touching it. Hold down the ALT key when you drag the wall and everything the wall is touching will move along with it.
Undo
A undo and redo system keeps track of every change you make in your level. You can undo changes by pressing Z. After you undo, you can redo by pressing Y.
Placing objects
To place objects, click the Add button (or press SPACE). A box will appear showing all of the objects that can be placed. Click any object and then left-click where you want it to appear. The object will be placed instantly. A preview will appear next to the mouse pointer showing exactly where the object will be placed. Some objects will snap to nearby walls if you move the mouse pointer near the wall.
Objects can be moved in front of or behind other objects. Use the [ and ] keys to move the selected object up or down in the display heirarchy.
Properties
Select an object by left-clicking. The object’s properties will appear in the property inspector. Every object has different properties that affect its behavior. Some objects (like some props) don’t have any properties.
Some special properties:
- Hidden: The object will be hidden until the reactor core is destroyed or beamed
- Phase: This determines the start time for objects that repeat their behavior in a loop. Adjust the phase to make objects start at different times.
- Cooldown: This is the time between repeated actions like shooting
Signals
Some objects have signals that allow them to trigger actions on other objects. For example, enemies have a Destroyed signal that activates when the enemy is destroyed. This is the same mechanism that allows the exit to appear when the reactor core is beamed or for buttons to activate laser gates.
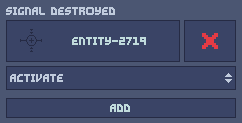
To connect a signal, click the Add button below the signal then click the Select button. Finally, select the object that you want to trigger. The property inspector will show the target object and action that will be triggered on that target object. Some objects have multiple actions that you can trigger. You can add as many connections as you’d like for each signal.
Not all objects have signals and not all objects have actions that can be triggered. Ones that do have a signal icon  .
.
Reactor core and exit beacon
Reactor cores have a Destroyed signal and an Beamed signal. Because the reactor cores are so important, make sure that you handle both the destroyed and beamed cases in every level with a reactor core to provide players with a good experience.
Props and decorations
Some objects are purely decorative. These include space grass, buildings, and rocks. These objects add visual interest to a level but don’t affect gameplay in any way.
Dialog
Dialog can be treated just like most objects. You can place dialog anywhere in the level. Dialog is activated in two ways: either through proximity or by a signal. To activate dialog when the player gets close to it, set the Dialog Area to a value greater than zero. Otherwise, the dialog will only be activated via signal.
Dialog has two signals: Say and Mute. Say activates the dialog. Mute causes the dialog to never activate.
Edit the dialog by clicking the Edit Dialog button in the dialog property inspector.
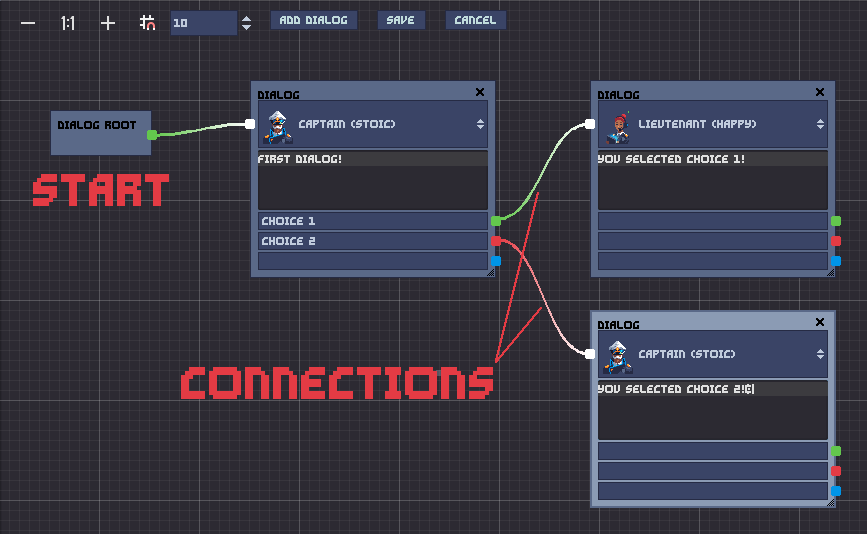
In the dialog editor, click Add Dialog to add another node. Each node has an actor, the text to say, and optional choices. If the choices are empty then only the green connection is used to advance to the next dialog node. Multiple choices are presented to the player so they can choose a branch.
Special tags in dialog text:
    [B] == Bold/emphasis
    [G] == Good
    [D] == Danger/scary
    [W] == Warning
    [F] == Fade out
    @MOVE, @AIM, @FIRE, @BEAM == Controls
Examples:
    The [B]reactor cores[/B] are very important!
    [G]You did a great job![/G]
    Oh no! [D]Look out![/D]
    I have a [W]weird feeling[/W] about this...
    [F]Echo echo echo echo...[/F]
    Use @MOVE to move your ship
    Use @FIRE to shoot
Demo
The demo version of the editor has a total object limit that shows in the upper left hand corner of the screen. Once you reach the limit, you can’t place any more new objects without deleting some old objects. Walls and decorative elements do not count against the limit. The demo also restricts the overall size of levels and doesn’t let you place objects outside of the demo boundaries.
All limits are removed in the full game and you can make levels of any size. Buy the full game on Steam or Itch.io.